Making thermal monitors yourself#
We are working on instructions for making our thermal monitors. Here are some pictures for the v3 monitor that will be sufficient for some solderers to assemble the hardware. There is a volunteer group in Edinburgh that has more detailed instructions that they are testing with solderers who are new to this kind of build. If you intend to build monitors, please ask us for them.
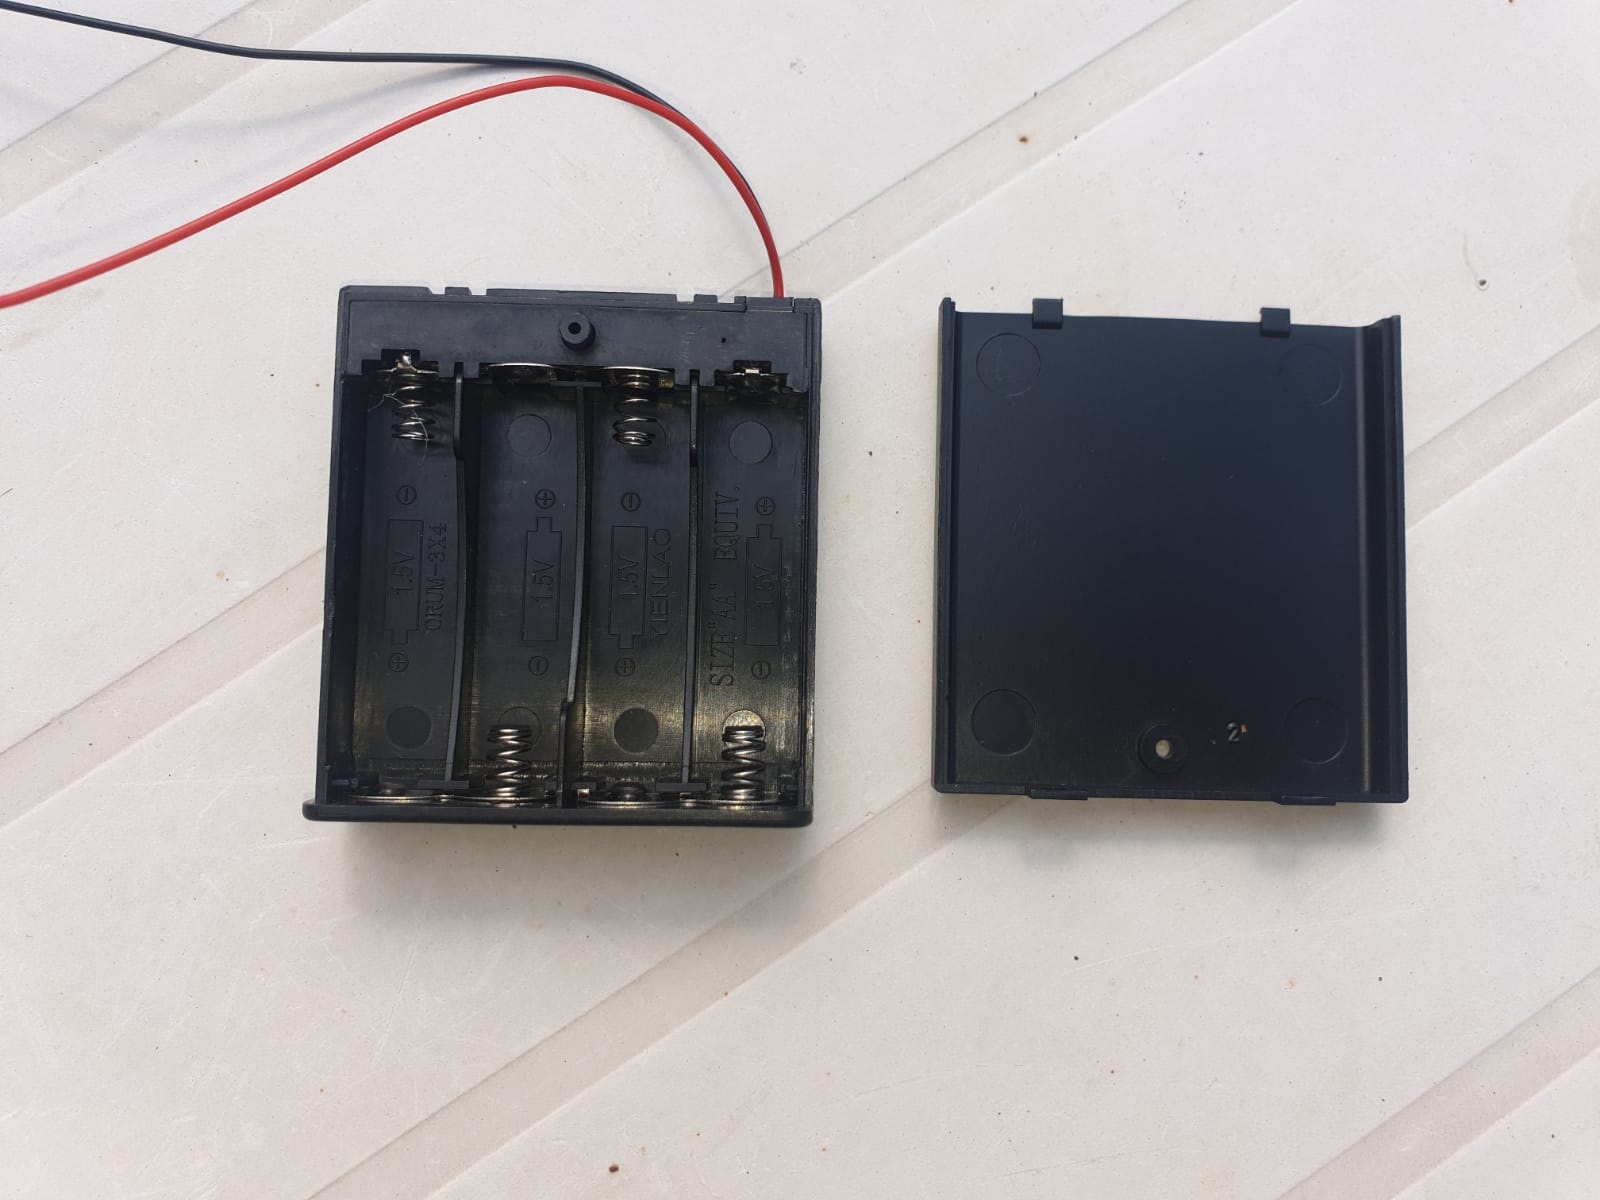

The build requires a rigid battery box with an on-off switch designed for 4 AA batteries, a small amount of solid core wire, a little double-sided tape, an ESP12F microcontroller, a DHT22 temperature and relative humidity sensor, and cork or another spacing material.
The required tools are a fine tipped soldering iron and soldering supplies, a small screwdriver, and a pair of tin snips or a Stanley knife.
The steps are:
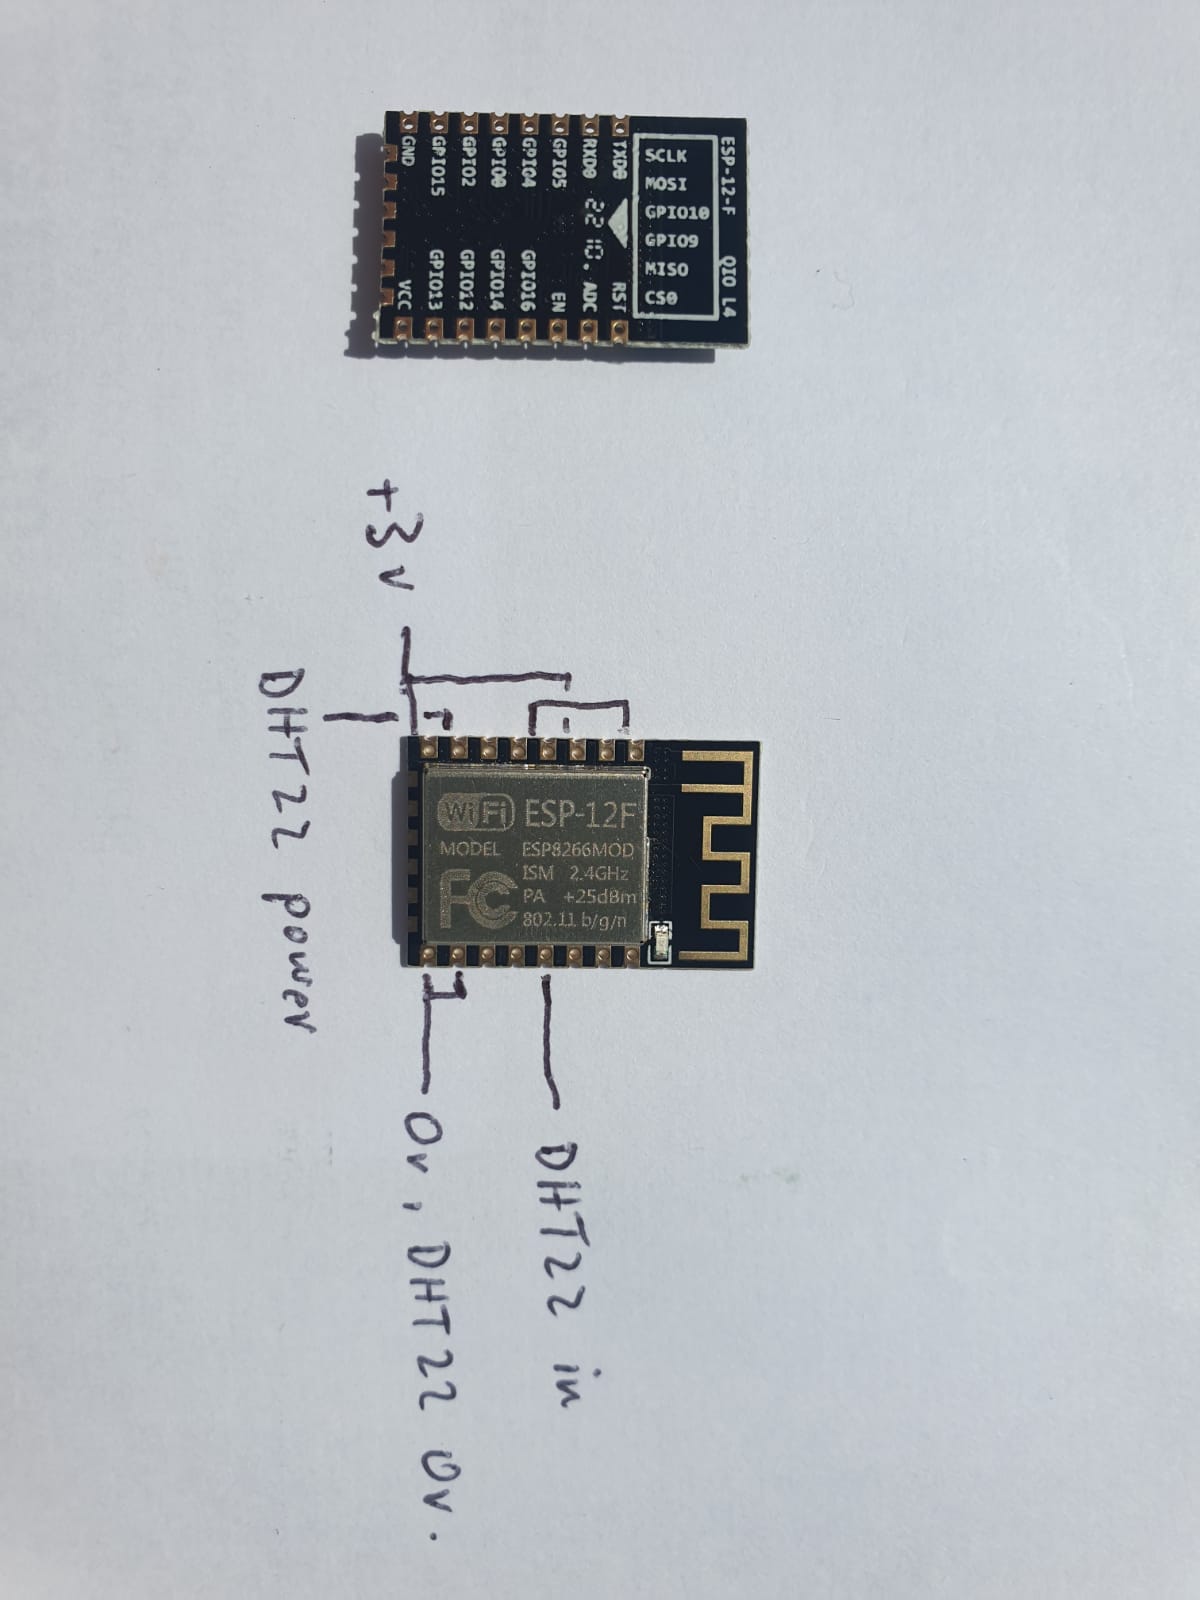
flash the ESP12F with software. This requires purchase of a matching “burner board”. The software will be open source but for now, contact us if you want to try this. Otherwise, please ask; we may be able to pre-flash an ESP12F and send it to you.
solder the wires onto the ESP12F. The order of soldering joins is not particularly important on this build. You might want to test the ESP12F and battery connection are working before attaching the DHT22, but if you do, remember to turn off the device and remove the batteries before soldering in the DHT22.
open the battery box and use the screwdriver to pop the removable plate off the wiring of the battery box and move the wires over.
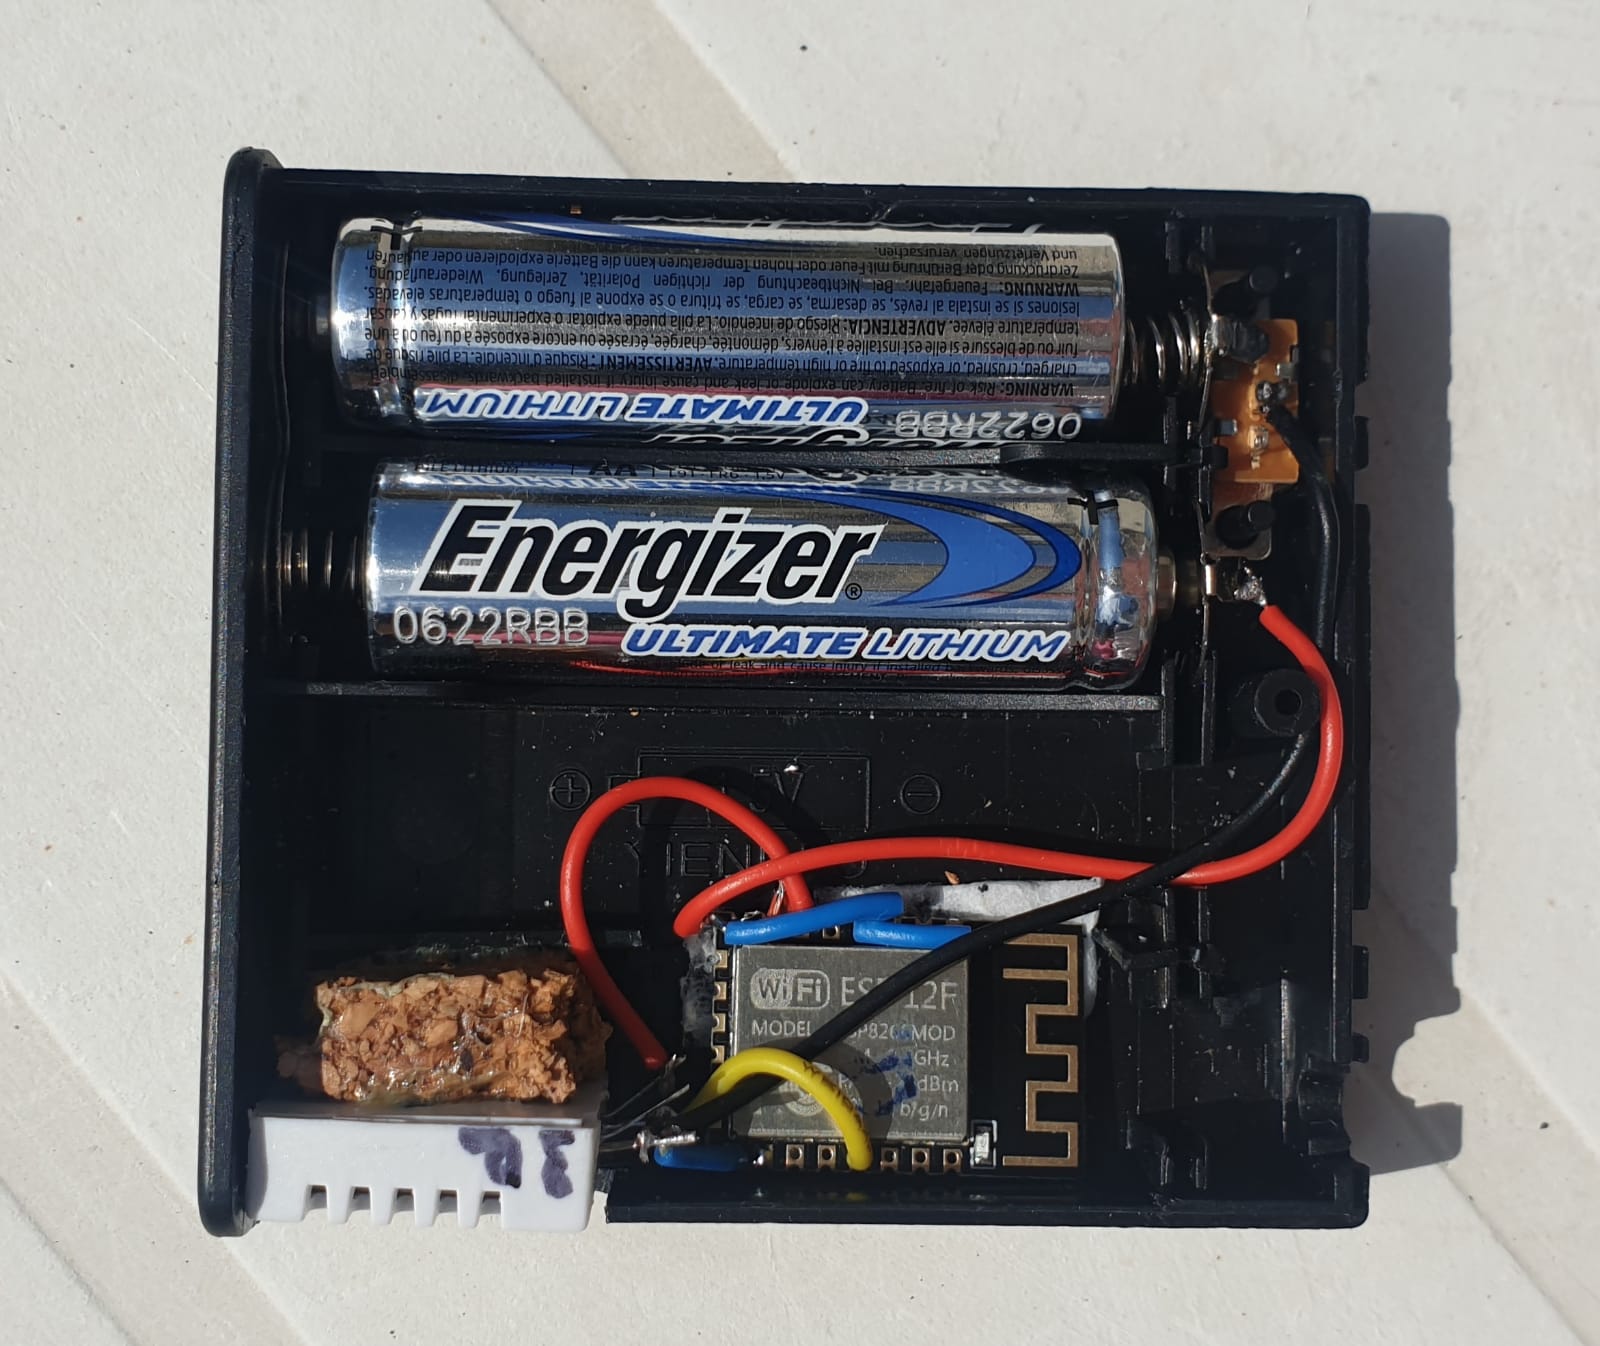
drill hole in the box where the ESP12F LED will shine through when it is turned on. It’s hard to get the hole in exactly the right spot. Whatever you do, take the lid off the box before using the drill to avoid damaging the ESP12F.
cut the right sized space in the side of the battery box on both halves
cut the divider between two adjacent spaces for batteries so that the ESP12F will fit.
use double-sided tape to stick the ESP12F into position in the battery box.
cut a cork spacer and glue it in to keep components in place.
Most of the battery consumption for our monitors is from keeping up a wifi connection. This takes 100mA with spikes up to 200mA - 400mA. Each set of batch readings takes 4 seconds of wifi up time, and there are 14 batches sent a day. If we assume the batteries combined are 2200mAh, that should be around 20 hours of wifi service. With the other power needs of the monitor, we’re hoping for a year of service from each pair of batteries.
We intend to change the build to include a very cheap breakout board that still fits into the box and makes the soldering easier.
We are experimenting with both 3.6V lithium batteries and 3 AA alkalines, as this is might be more convenient for groups, but with the disadvantage of shorter battery life. We are also experimenting with replacing the DHT22 with an HTU21 temperature and relative humidity sensor because we think this will give more accurate data and reduce the amount of wifi uptime required.
Important
If you intend to post devices to user groups, keep in mind that you need to comply with guidance about the packaging of batteries.
IATA lithium battery guidance This is from the air industry but the rules are very widely adopted including by Royal Mail.